# BTC Guide for Administrators
# Introduction
Insert introduction here# Setting Up
This page should include the summary of the ff:
1. Where to download or access the product
2. Installation guide or getting started guide
3. Quick summary of the product
4. Bookings
5. Refunds
6. Setting up
7. Whom to approach in case of any difficulty (place your contact details)
8. Warnings related to set up# Logging in
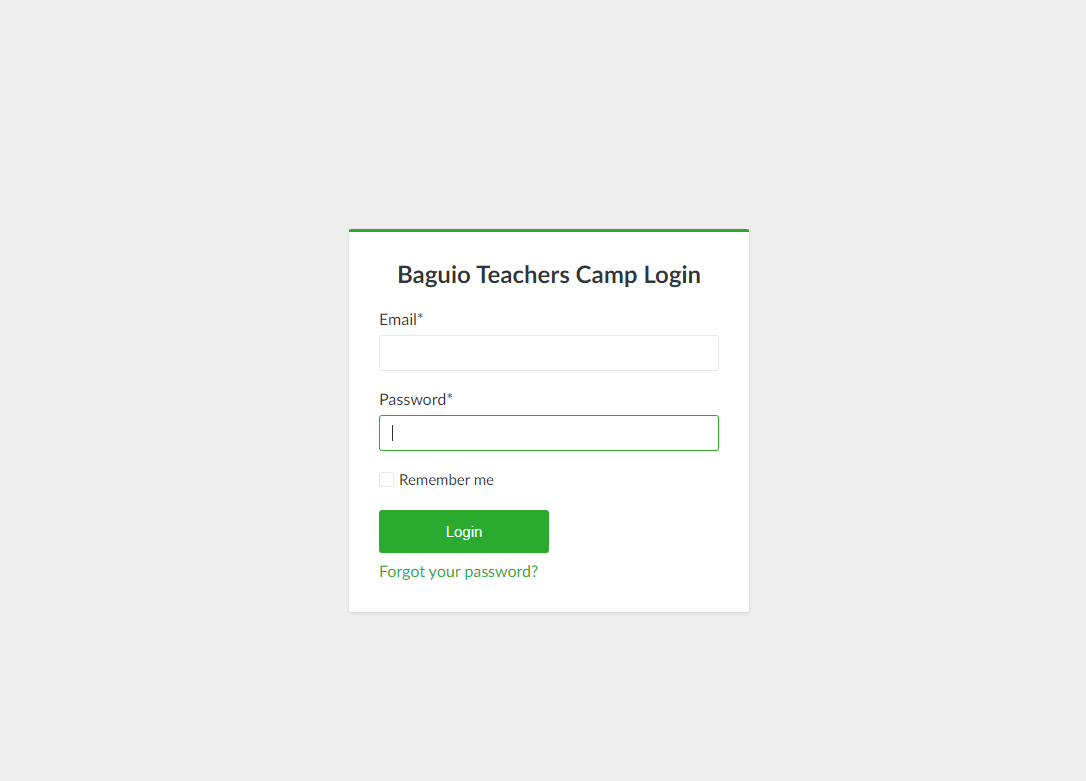
**Summary: This article provides instructions on how to login an admin user account.**
1\. Admin users can login by going to [https://btc.intelimina.com/admin/login](https://btc.intelimina.com/admin/login) and entering their user credentials:
[](https://wiki.onlinedooze.com/uploads/images/gallery/2022-04/image-1650256279590.PNG)
2\. Upon successful login, the admin user is directed to the Online Dooze Dashboard.# Page Structure
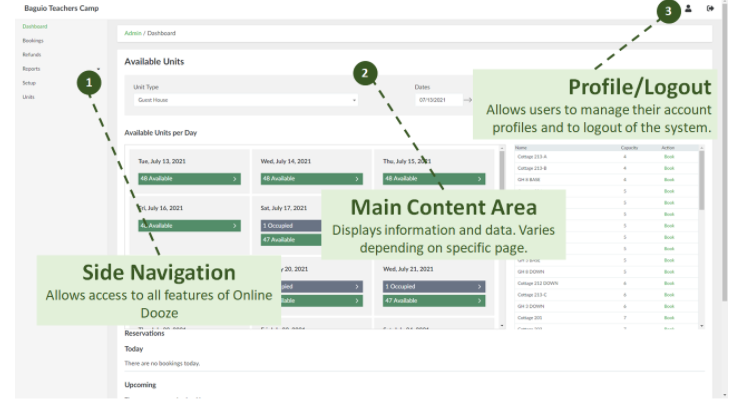
**Summary: This article provides a guide for the BTC user interface.**
[](https://wiki.onlinedooze.com/uploads/images/gallery/2022-04/image-1649740270611.png)
The following are the list of what can be seen in the user interface:
**1. Side navigation:-**This is where all features can be seen
**2. Main Content Area**- Shows all the needed information and data value.
**3. Profile/Logout-** Lets the user control his/her account, and to close his/her account by logging out.# Online Dooze Modules
**Summary: This articles provides the list of the basic features of the user interface**
- Dashboard - Contains summary information available units per day, current and upcoming bookings
- Bookings - Allows management and processing of bookings
- Refunds - Allows viewing of refunds from cancelled bookings
- Reports - Allows generation of accommodation and cash flow reports as well as client statement of accounts
- Units - Allows viewing and management of units used for bookings
- Setup - Allows configuration of system prerequisites# Booking Phases
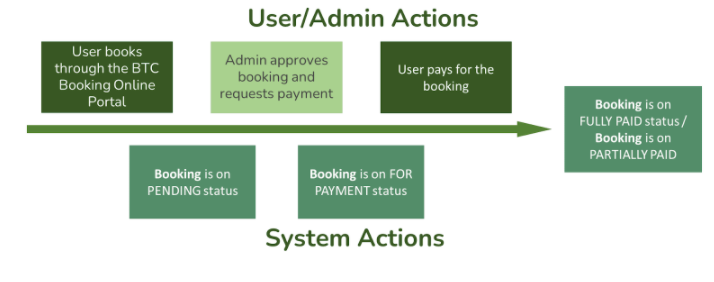
**Summary: This articles provides instructions on how to successfully make a booking.**
1. The process starts with the user/client booking through the BTC Booking Online Portal. The user/client provides the specifics of the booking and reserves a unit.
2. The user/client will receive an email confirmation that a booking entry has been created.
3. The booking entry appears in the system with pending status; BTC admin can view and approve the booking entry and then request payment from the user/client.
4. User/client pays for the booking (either confirmation fee or full payment.
5. Upon payment, booking status becomes FULLY PAID (if paid full) or PARTIALLY PAID.
[](https://wiki.onlinedooze.com/uploads/images/gallery/2022-04/image-1649740617188.png)# Viewing List of Bookings Page
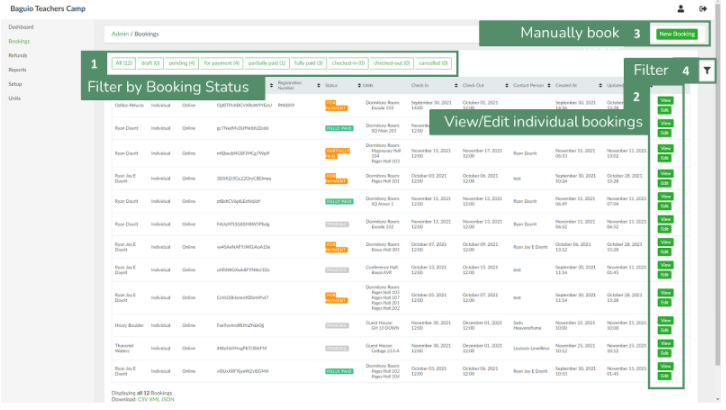
**Summary: This article provides instructions on how to view the bookings page.**
1. From side navigation, click **Bookings.** This will load the list of bookings page.
[](https://wiki.onlinedooze.com/uploads/images/gallery/2022-04/image-1649740647369.png)
2. List can be filtered either by using the preset tabs based on booking status (1) or making use of the filter button (4).
3. To view a booking entry information, select a booking entry and click the **View** button (2).
[](https://wiki.onlinedooze.com/uploads/images/gallery/2022-04/image-1649740668257.png)
**In the booking information page, the admin can:**
1. Edit Booking - update booking information, add reservations, add-ons, and additional fees.
2. Approve Booking - approve booking. Name of admin who approved the booking will appear under Booking Details (#5)
3. For Payment - change the status from PENDING to FOR PAYMENT and sends an email to user/client requesting for payment.
4. Cancel Booking - cancel booking
5. The admin can also review various information about the booking:
6. Booking Details - Booking type, guest numbers, guest types etc.
7. Guest information
8. Reservations - reservation details and costs
9. Bills - list of bills and their corresponding status.[](https://wiki.onlinedooze.com/uploads/images/gallery/2022-04/image-1649740762390.png)
10. Subtotal - breakdown of fees
11. Total - total payables# Processing Online Bookings
**Summary: This article provides instructions on how to process online bookings.**
Once the user has successfully booked a unit from the website portal, a booking entry will be created in the system with Pending status (see Booking Phases above).
**To process a pending booking entry:**
1. In the list of bookings page, select a booking entry and click **View**.
2. If the booking entry will be modified, click **Edit Booking**, otherwise proceed to the next step. See next section for adding additional reservations, addons, and fees.
3. To approve booking, click the **Approve Booking** button.
4. To request payment, click the **For Payment** button, otherwise, click the **Cancel Booking** button.
5. The booking status will be changed to either **For Payment** status if confirmed or **Cancelled** status if cancelled.
6. Once confirmed, a billing entry will be created in the Bills section with Pending status, and a payment entry in the Payments section with pending status.[](https://wiki.onlinedooze.com/uploads/images/gallery/2022-04/image-1649740819181.png)
7. Once payment has been settled by the user, the booking entry status will change from **FOR PAYMENT** to **FULLY PAID or PARTIALLY PAID**. This will also change the status of the bill from **pending** to **completed** and the status of the payment from **unprocessed** to **completed**.
8. To add a user payment manually, click the **Add Payment** button. To cancel the bill, click the **Cancel Bill** button.# Manually Adding Booking Entries
**Summary: This article provide instructions on how to add a book entry**
1. In the list of bookings page, click the **New Booking** button. This will open the Create New Booking page:[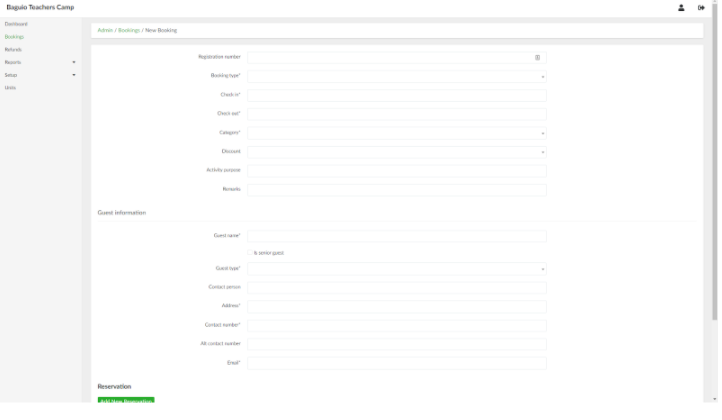](https://wiki.onlinedooze.com/uploads/images/gallery/2022-04/image-1649741001987.png)
2. Provide the necessary information in their respective fields.
3. To add a reservation, click the **Add New Reservation** button and provide the necessary details in their respective fields. Click the button again to add additional reservations.
4. To add addons, click the **Add New Addon** and select an addon to add. Click the button again to add additional addons.
5. To add additional fees, click the **Add New Fees** button and select a fee to add. Click the button again to add additional fees.
6. When done, click the **Create Booking** button.# Modifying Booking Entries
**Summary: This articles provides instructions on how to modify booking entries.**
Booking entry information can be modified either when in Pending or Completed status. Adding reservations, addons, and fees also requires modifying the booking entry. To modify the booking entry:
1. In the list of bookings page, select a booking entry and click **Edit.** Alternatively, in the booking entry information page (Booking entry > View), click the **Edit Booking** button. This will open the Edit booking entry page.
2. Modify the desired booking information and/or guest details.
3. The admin can add new reservations, addons, and fees by scrolling to the bottom of the form and clicking the appropriate button:[](https://wiki.onlinedooze.com/uploads/images/gallery/2022-04/image-1649741063352.png)
4. To add a new reservation, click the **Add New Reservation** button.
5. To add add-ons, click the **Add New Add-on** button.
6. To add a new fee, click the **Add New Fee** button.
7. Once done, click the **Update Booking** button.
*For modifications resulting in additional payables, the admin needs to create a new bill entry. Scroll down the booking entry information page and click the **Create New Bill** button.*# Bill Adjustments
**Summary: This article provides instructions on how to adjust the bill for bookings.**
**Note:** If the booking modification involves addition of fees, the system will request a bill adjustment - this will be indicated in the booking information page:
[](https://wiki.onlinedooze.com/uploads/images/gallery/2022-04/image-1649741118042.png)
**To process the bill adjustment:**
1. Scroll to the bottom of the booking details page and click the **Proceed with Bill Adjustment** button. This will add another payment entry under the Payments section. Note that if the bill has already been settled before, a bill adjustment will bring the bill back to Pending status:[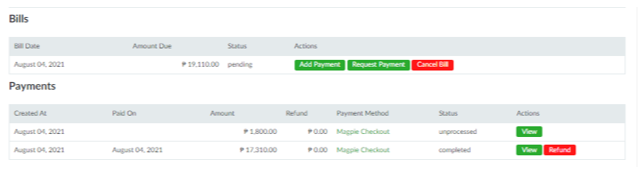](https://wiki.onlinedooze.com/uploads/images/gallery/2022-04/image-1649741138807.png)
2. Follow steps **\#6** onwards in the section[ **Processing Online Bookings**](https://wiki.onlinedooze.com/books/online-btc-guide-for-administrators/page/processing-online-bookings).# Cancelling Booking Entries
**Summary: This articles provides instructions on how to cancel booking entries.**
**Note:** Booking entries can be cancelled at any point from Pending status till Paid status. When underpaid status, a refund can be processed as well. Note that booking can only be cancelled before Checking-in.
**To cancel a booking entry:**
1. In the booking entry information page, click the **Cancel Booking** button. This will open the Booking Cancellation page:[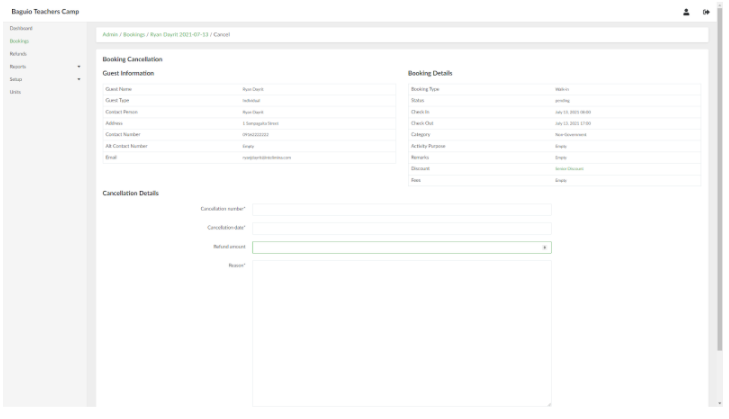](https://wiki.onlinedooze.com/uploads/images/gallery/2022-04/image-1649741264721.png)
2. Provide the necessary information for the booking cancellation. When done, click the **Create Booking cancellation** button. *Note that any amount provided in the Refund amount field will be ignored if the booking entry is not underpaid status (i.e. the user has not paid yet).*
3. To access the list of refunds made, in the side navigation pane, click **Refunds**. This will open the list of Refunds page.[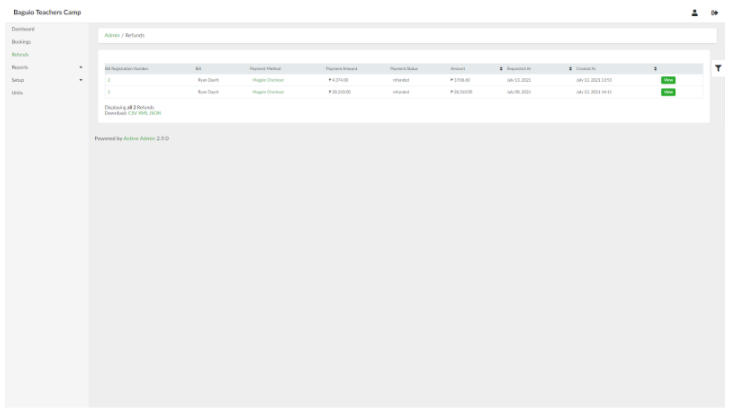](https://wiki.onlinedooze.com/uploads/images/gallery/2022-04/image-1649741292018.png)
4. Refund information can be viewed by selecting the Refund entry and clicking **View**.# Booking Check-in and Check-out
**Summary: This article provide instructions on how to check-in and check-out of your booking.**
Upon initial payment, the check-in button will be available in the booking details page.
1. To check-in, click the **Check-in** button in the booking details page.[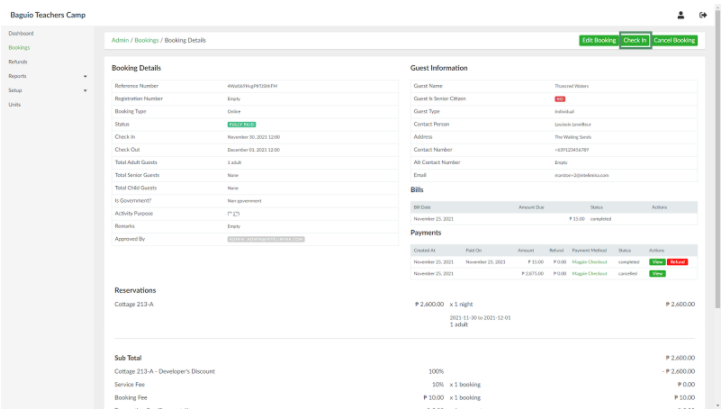](https://wiki.onlinedooze.com/uploads/images/gallery/2022-04/image-1649741355304.png)
This will open the Check in page:
[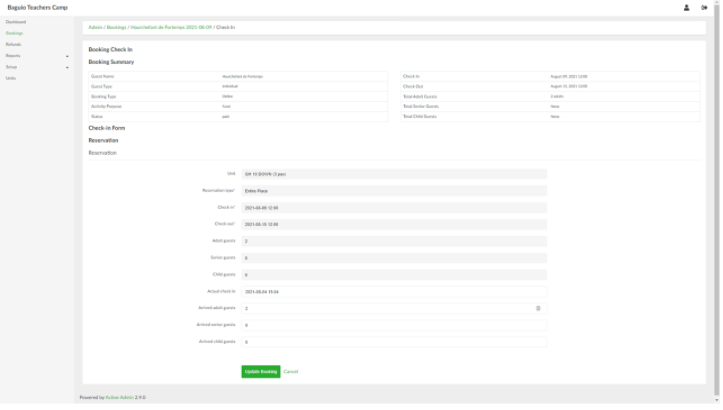](https://wiki.onlinedooze.com/uploads/images/gallery/2022-04/image-1649741371399.png)
*Note that check-in cannot be done prior to the declared booking check-in date.*
2. Update the fields as needed. When done, click the **Update Booking** button. This will change the status of the booking from Paid to Checked-In. The check-in details can be updated by clicking the **Edit Check-in** button.[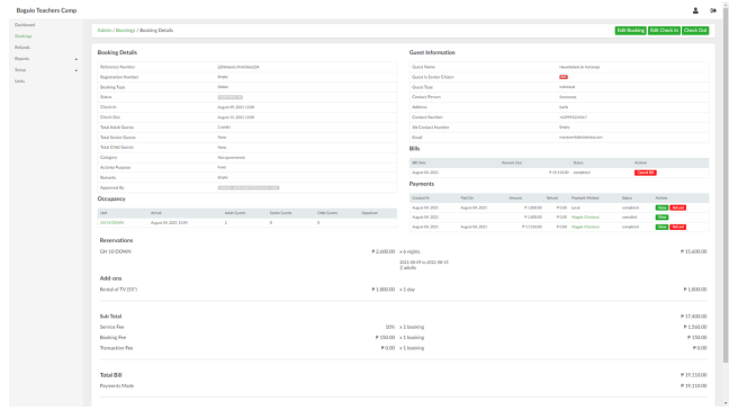](https://wiki.onlinedooze.com/uploads/images/gallery/2022-04/image-1649741430230.png)
3. To check-out, click the **Check-out** button in the booking details page. This will open the Check-out page:[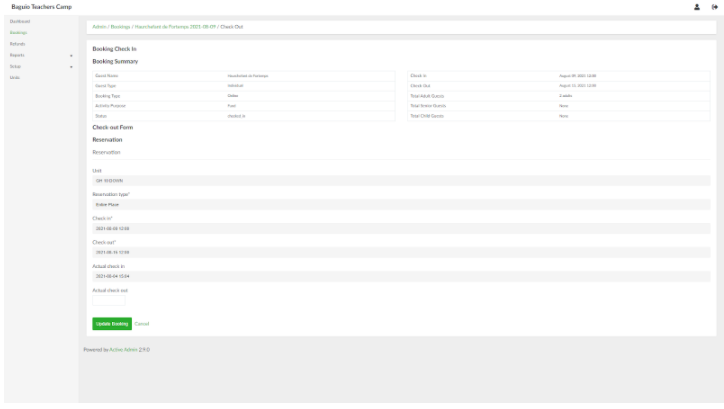](https://wiki.onlinedooze.com/uploads/images/gallery/2022-04/image-1649741448428.png)
4. Provide the date of the actual check out. When done, click the **Update Booking** button.# Viewing Lists of Unit Page
**Summary: This article provides instructions on how to view listings of available units.**
1. In the side navigation pane, click **Units**. This will open the List of Units page:
[](https://wiki.onlinedooze.com/uploads/images/gallery/2022-04/image-1649741754923.png)
In the List of Units page:
1. Filters based on unit type can be used to narrow down the list of units.
2. Each specific unit can be viewed and edited.# Viewing a Specific Unit
**Summary: This article provides instructions on how to view a specific unit.**
1. In the List of Units page, select the desired unit and click the **View** button. This opens the Unit details page:
[](https://wiki.onlinedooze.com/uploads/images/gallery/2022-04/image-1649741787630.png)# Creating a New Unit
# How to Create a New Unit
**Summary: This article provides instructions on how to create a unit.**
1\. In the list of units page, click the New Unit button. This will open the Create New Unit page. [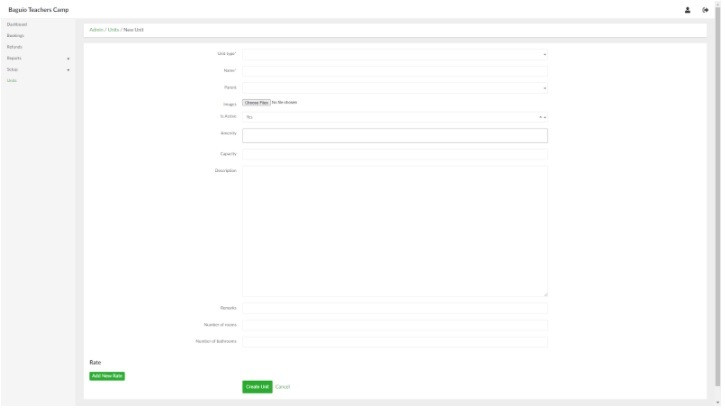](https://wiki.onlinedooze.com/uploads/images/gallery/2022-04/btc3.jpg)
2\. Provide the necessary information in their respective fields. *Note that certain information such as Unit Type and Amenities need to be created first under Setup before they can be included in creating a Unit.*
3\. When done, click the Create Unit button.
# Adding Rates
Rates add specific booking information such as booking price, person per unit, duration length, start and end time (if applicable).
1. In the Create Unit page (see above), click Add New Rate button. This will show additional fields shown below:
[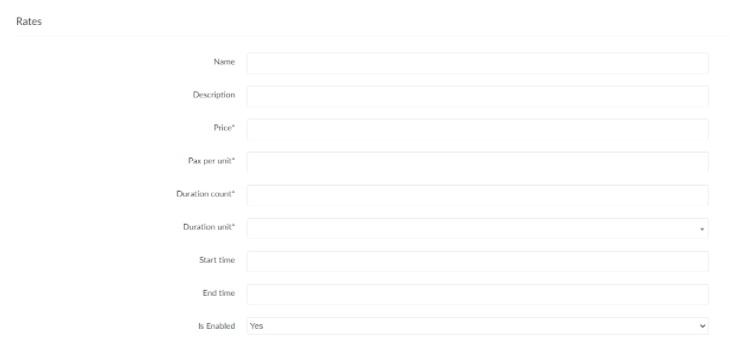](https://wiki.onlinedooze.com/uploads/images/gallery/2022-04/image-1649741846999.png)
- Name and Description - if applicable, labels and describes the rate.
- Price - booking price per duration (see below)
- Pax per unit - number of people included in the booking price for the unit
- Duration count - duration length covered by the booking price
- Duration unit - duration length unit (days/nights/hours)
- Start time and End time - if applicable, rate can include start and end times (follows 24-hour format)
- Is Enabled - if set to No, the rate is not viewable by the user/client.
2. To add more rates, click the **Add New Rate** button.
3. To remove a rate, click the **Remove** button.
# Updating Units and Rates
How to update units and rates:
1. In the List of Units page, select the desired unit and click the **Edit** button. A unit can also be edited by clicking the **Edit Unit** button from the Unit details page. This will open the Edit Unit page.
2. Update the desired fields. *Note that existing rates cannot be removed.*
3. When done, click the **Update Unit** button.# Reports
There are several reports that can be viewed and downloaded.
# Cash Flow Report
Cash flow reports give a list of receipts and disbursements.
To access this, on the side navigation pane, click **Reports** > **Cash Flow Report**.
[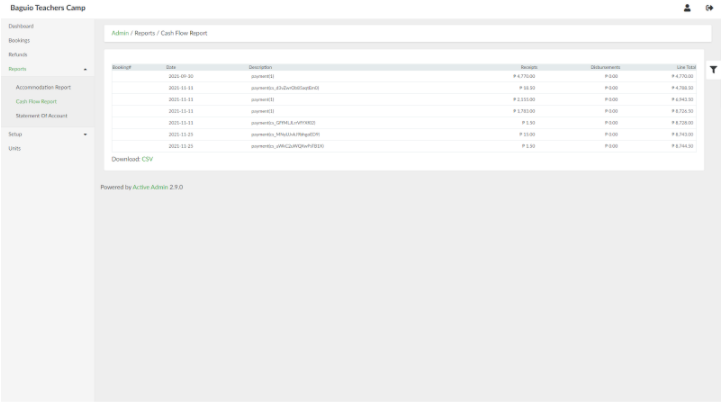](https://wiki.onlinedooze.com/uploads/images/gallery/2022-04/image-1649742097129.png)
# Statement of Account
Statement of Account reports allows viewing of statement of account for each user/client.
To access this, on the side navigation pane, click **Reports > Statement of Account**.
[](https://wiki.onlinedooze.com/uploads/images/gallery/2022-04/image-1649742137735.png)
# Accomodation Report
Accommodation reports give the list of bookings, stay dates and duration, number of guests etc.
To access this, on the side navigation pane, click **Reports** > **Accommodation Report**.
[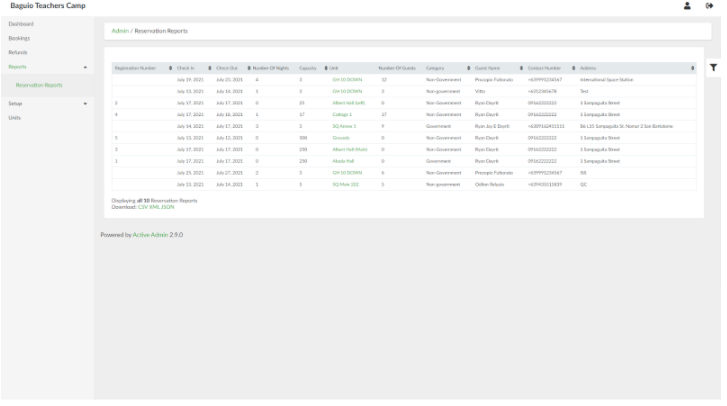](https://wiki.onlinedooze.com/uploads/images/gallery/2022-04/image-1649742027725.png)
# Setup
Setup allows for configuration of prerequisites such as amenities, discounts, fees, refund settings, and unit types, as well as admin users, and roles and permissions.# Unit Type
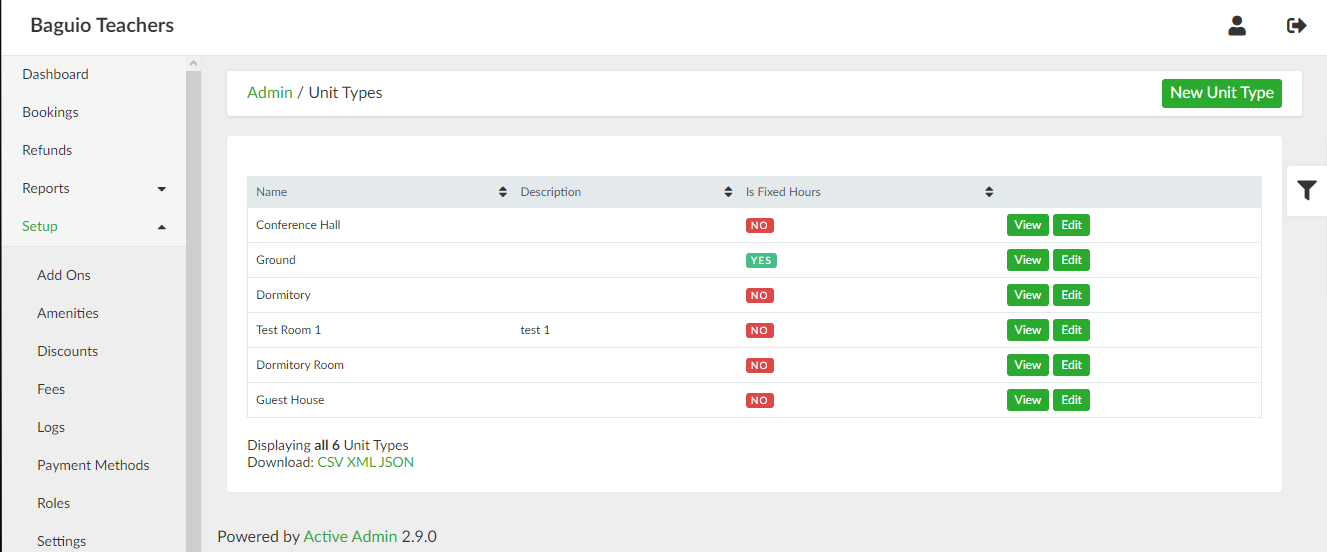
# List of Unit Types page
List of Unit Types can be accessed through the side navigation pane by clicking **Setup** > **Unit Type**.
[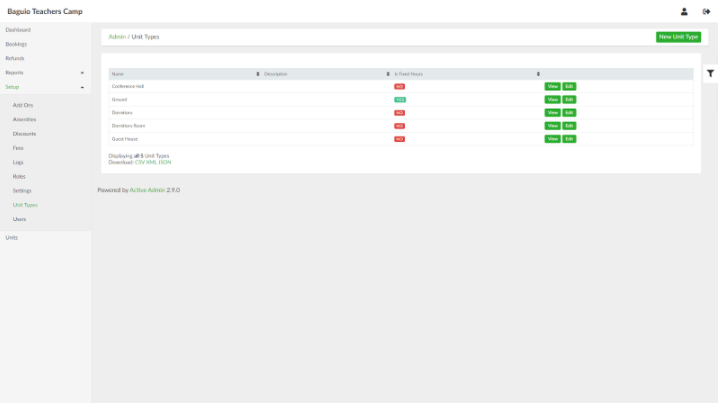](https://wiki.onlinedooze.com/uploads/images/gallery/2022-04/image-1649742205565.png)
# Adding New Unit Type
To add a new unit type, in the list of unit types page, click the **New Unit Type** button.
[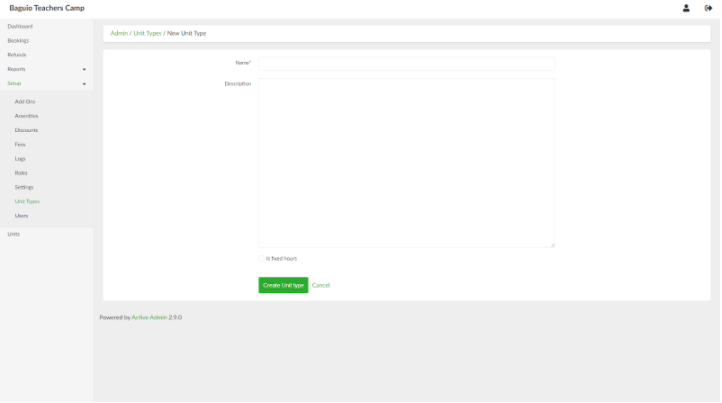](https://wiki.onlinedooze.com/uploads/images/gallery/2022-04/image-1649742227068.png)
Provide the details of the unit type in the respective fields. If the units under the unit type can have discounts applied to them, tick the *Is discountable* check box.
When done, click the **Create Unit type** button.
# Viewing a Unit Type
In the list of unit types page, select a unit type and click **View**.
[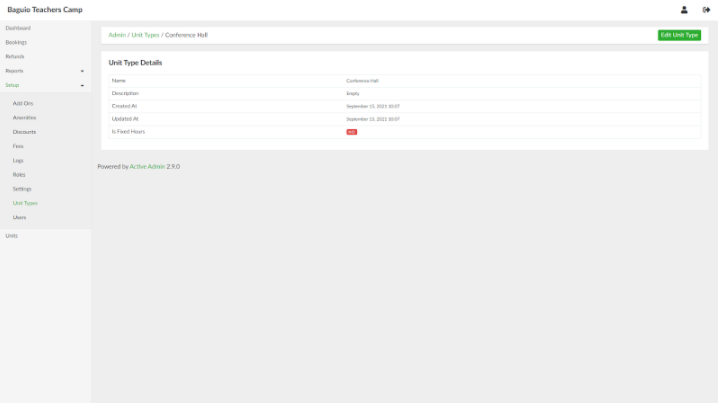](https://wiki.onlinedooze.com/uploads/images/gallery/2022-04/image-1649742260986.png)
# Updating a Unit Type
In the list of unit types page, select a unit type and click **Edit**.
[](https://wiki.onlinedooze.com/uploads/images/gallery/2022-04/image-1649742350088.png)
# Amenities
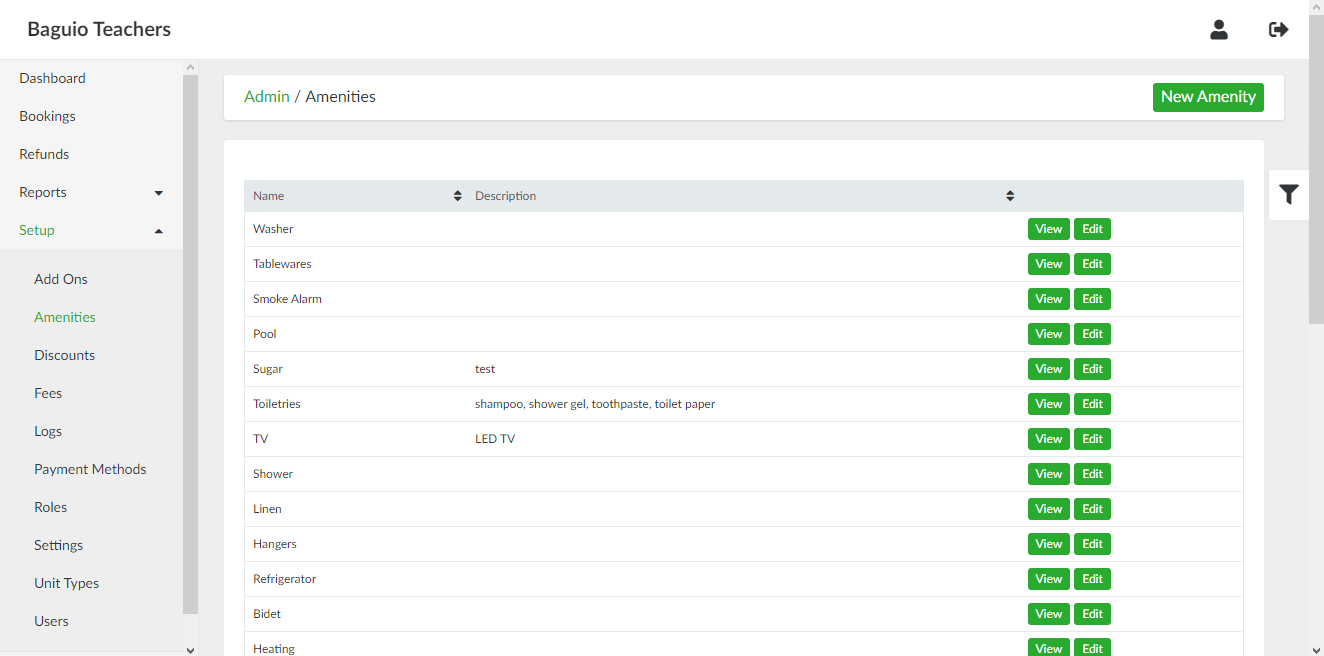
# List of Amenities page
List of Amenities page can be accessed through the side navigation pane by clicking Setup > Amenities.
[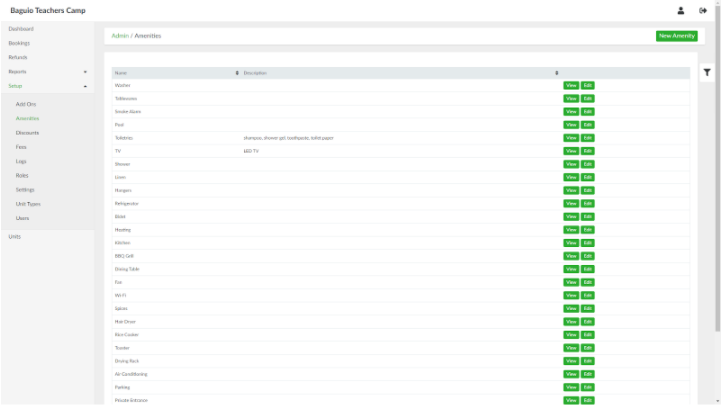](https://wiki.onlinedooze.com/uploads/images/gallery/2022-04/image-1649742384065.png)
# Adding a New Amenity
To add a new amenity, in the list of amenities page, click the **New Amenity** button. Provide the details of the amenity in the respective fields.
[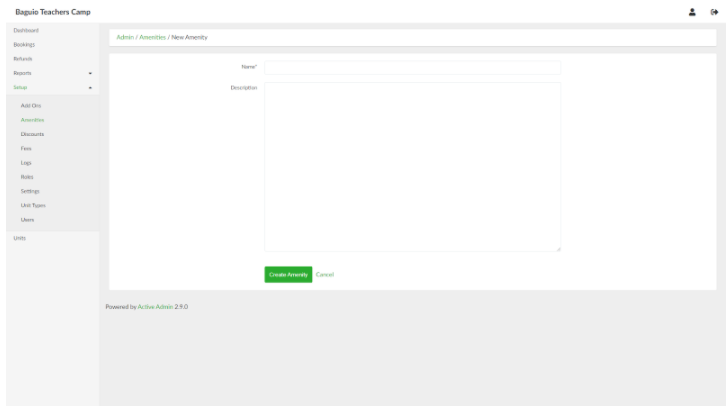](https://wiki.onlinedooze.com/uploads/images/gallery/2022-04/image-1649742406500.png)
When done, click the **Create Amenity** button.
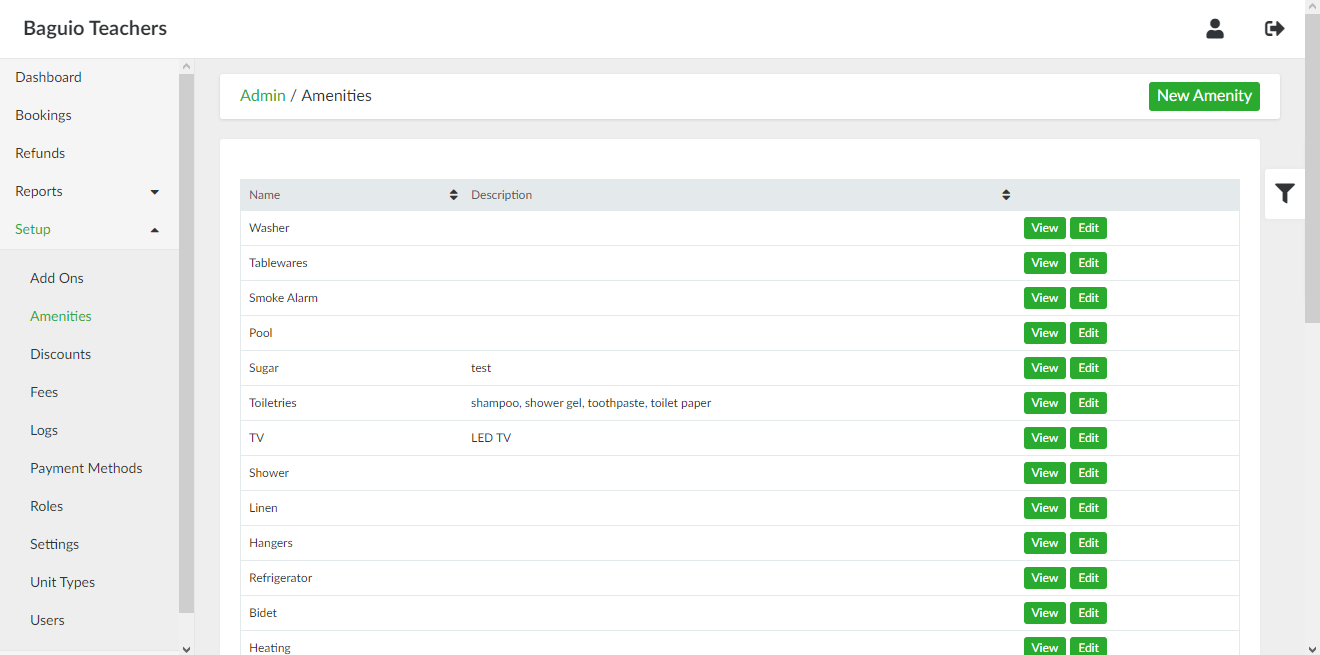
# Viewing an Amenity
In the list of amenities page, select an amenity and click **View**.
[](https://wiki.onlinedooze.com/uploads/images/gallery/2022-04/image-1649742451326.png)
# Updating an Amenity
In the list of amenities page, select an amenity and click **Edit.**
[](https://wiki.onlinedooze.com/uploads/images/gallery/2022-04/image-1649742494084.png)
# Fees
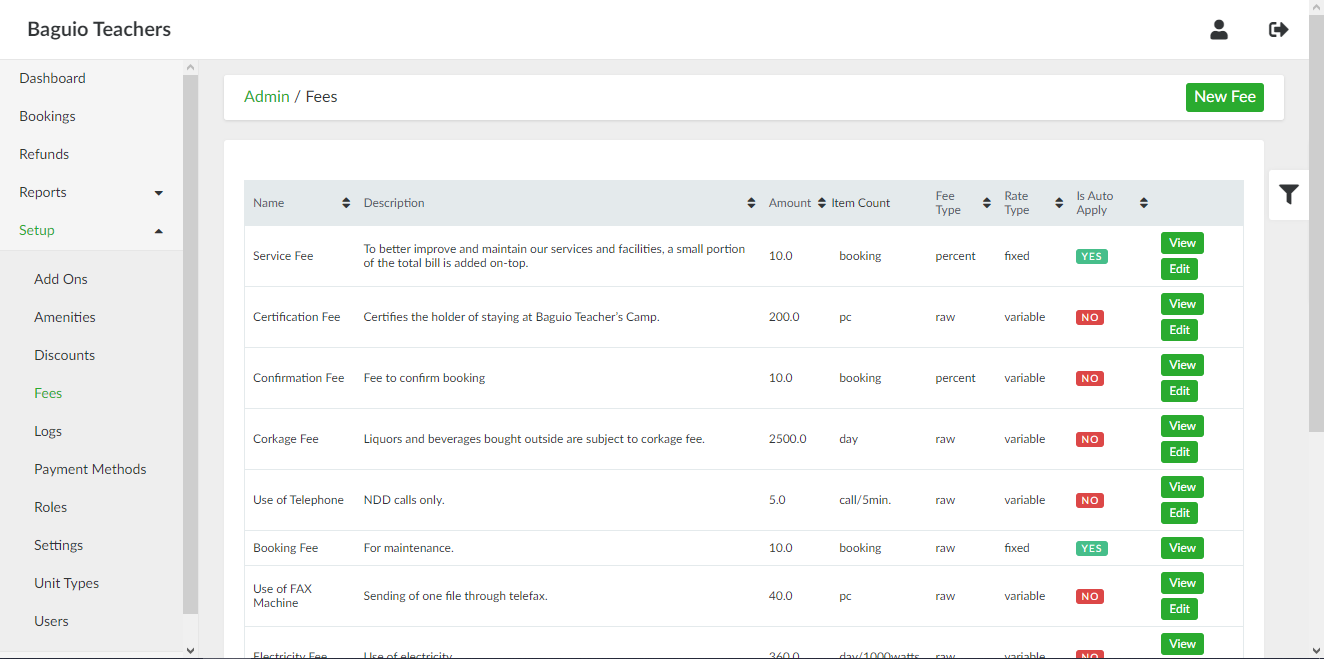
# List of Fees page
List of Fees page can be accessed through the side navigation pane by clicking **Setup > Fees**.
[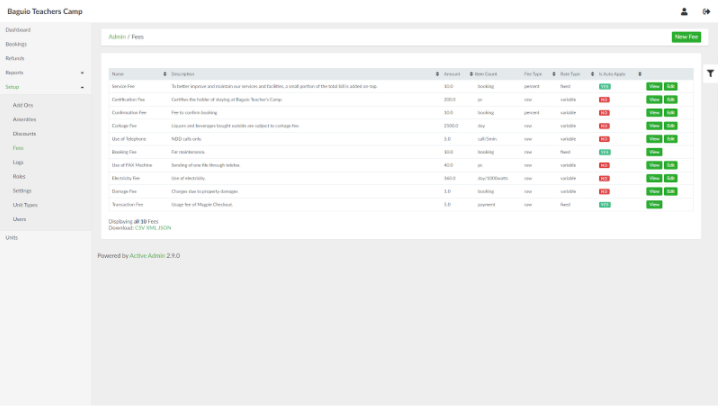](https://wiki.onlinedooze.com/uploads/images/gallery/2022-04/image-1649754962569.png)
# Adding a New Fee
To add a new fee, in the list of fees page, click the **New Fee** button. Provide the details of the fee in the respective fields. If the fee will be applied upon initial creation of booking entry, tick the *Is auto apply* check box.
[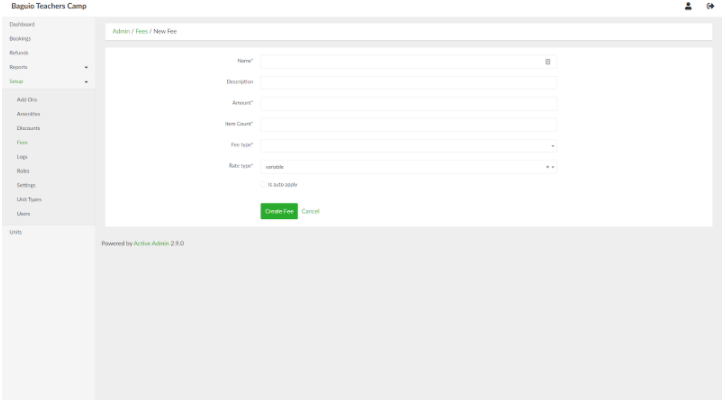](https://wiki.onlinedooze.com/uploads/images/gallery/2022-04/image-1649754988953.png)
When done, click the **Create Fee** button.
# Viewing a Fee
In the list of fees page, select an amenity and click **View**.
[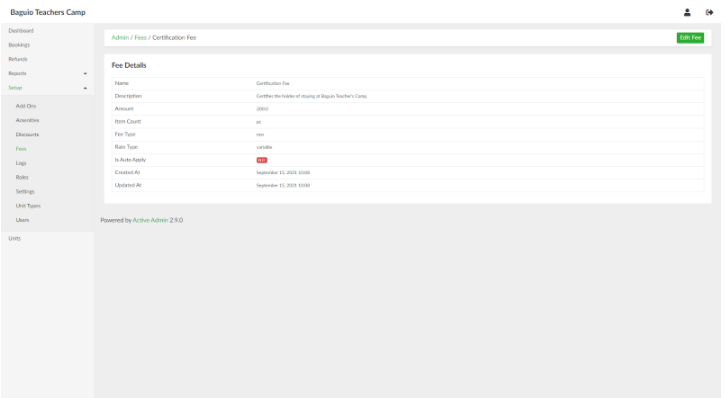](https://wiki.onlinedooze.com/uploads/images/gallery/2022-04/image-1649755018636.png)
# Updating a Fee
In the list of fees page, select a fee and click **Edit**.
[](https://wiki.onlinedooze.com/uploads/images/gallery/2022-04/image-1649755072001.png)
[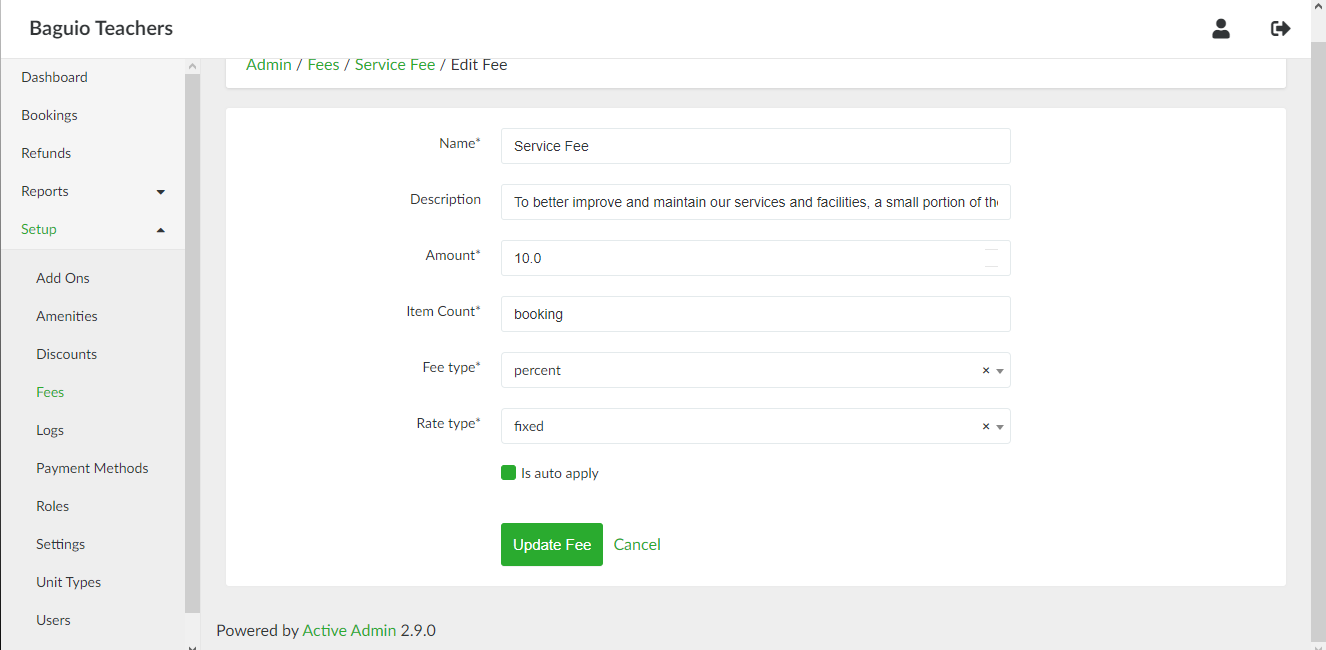](https://wiki.onlinedooze.com/uploads/images/gallery/2022-04/image-1649755060208.png)
# Discounts
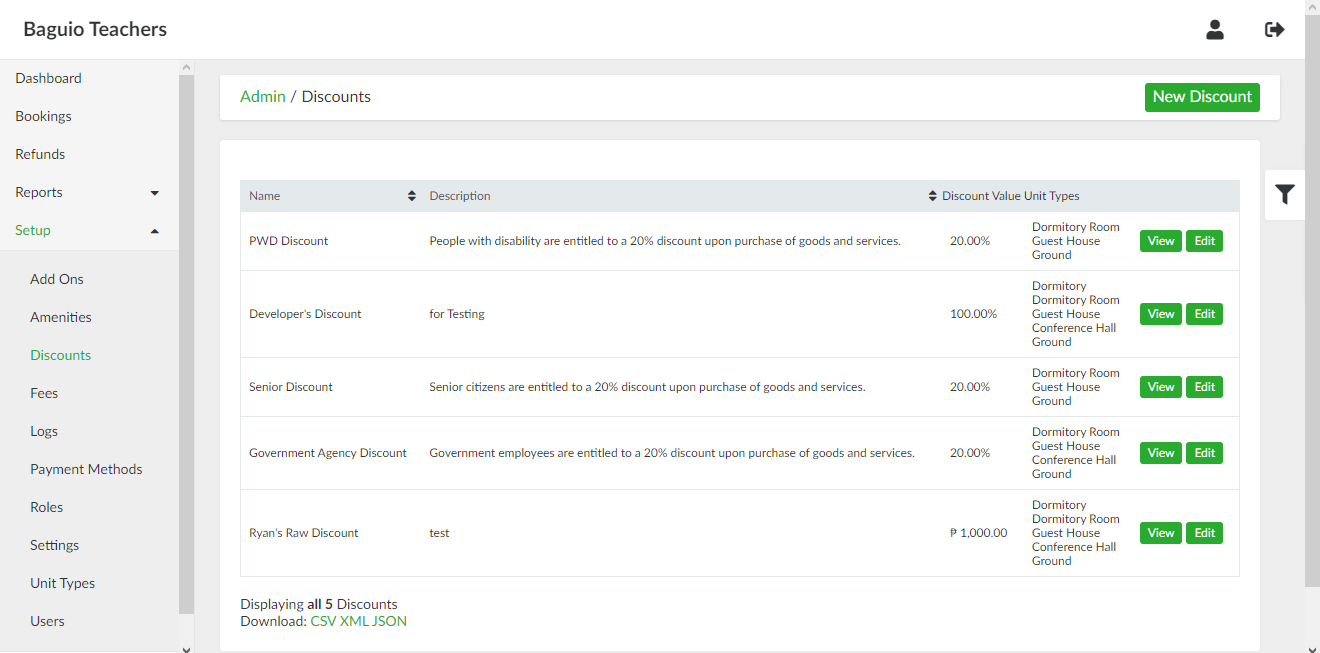
# List of Discounts page
List of Discounts page can be accessed through the side navigation pane by clicking **Setup > Discounts**.
[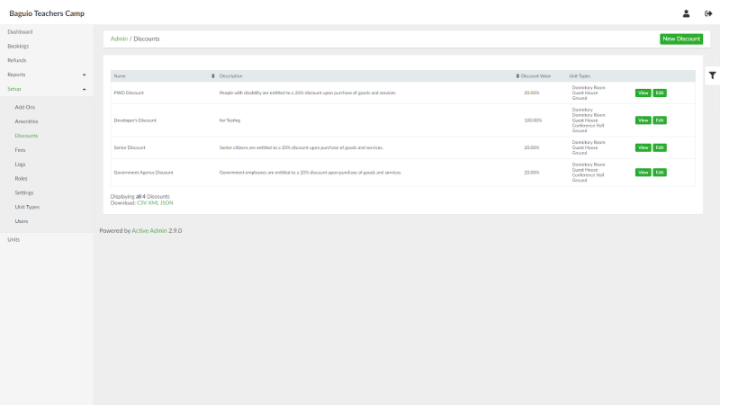](https://wiki.onlinedooze.com/uploads/images/gallery/2022-04/image-1649755107105.png)
# Adding a New Discount
To add a new discount, in the list of discounts page, click the **New Discount** button. Provide the details of the discount in the respective fields.
[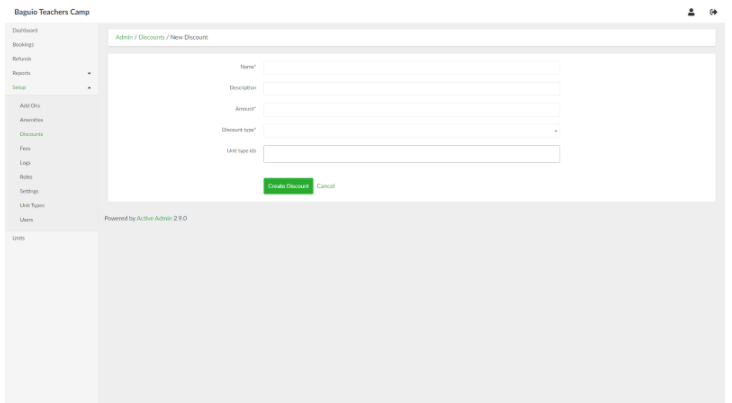](https://wiki.onlinedooze.com/uploads/images/gallery/2022-04/image-1649755123396.png)
When done, click the **Create Discount** button.
# Viewing a Discount
In the list of discounts page, select a discount and click **View**.
[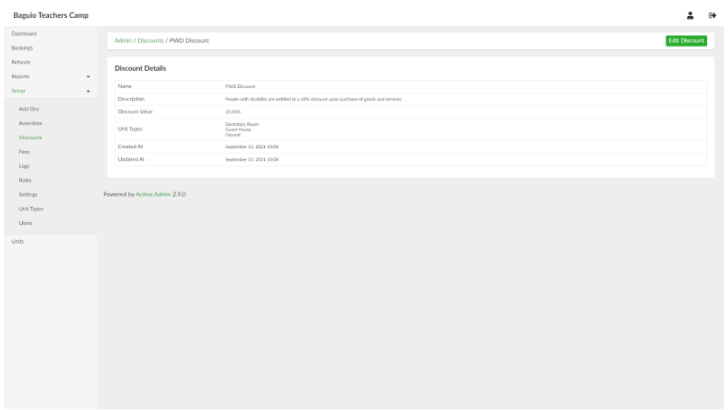](https://wiki.onlinedooze.com/uploads/images/gallery/2022-04/image-1649755152126.png)
# Updating a Discount
In the list of discounts page, select a discount and click **Edit**.
[](https://wiki.onlinedooze.com/uploads/images/gallery/2022-04/image-1649755177225.png)
[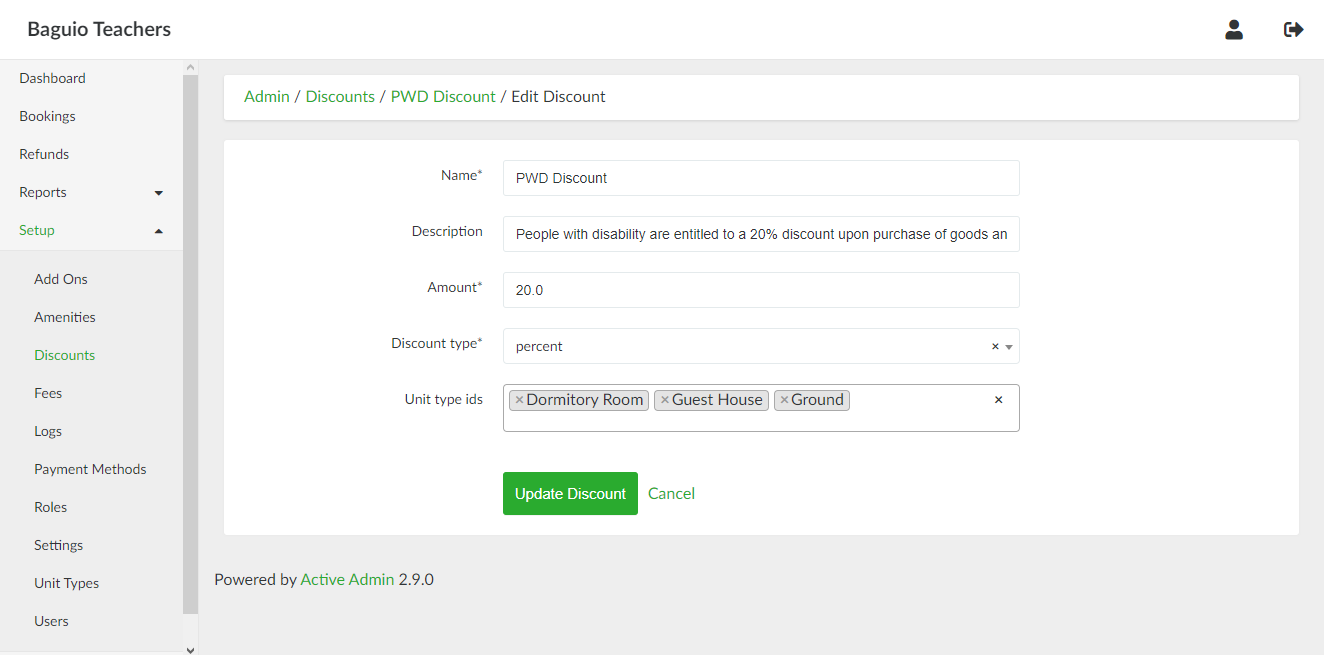](https://wiki.onlinedooze.com/uploads/images/gallery/2022-04/image-1649755192490.png)
# Users
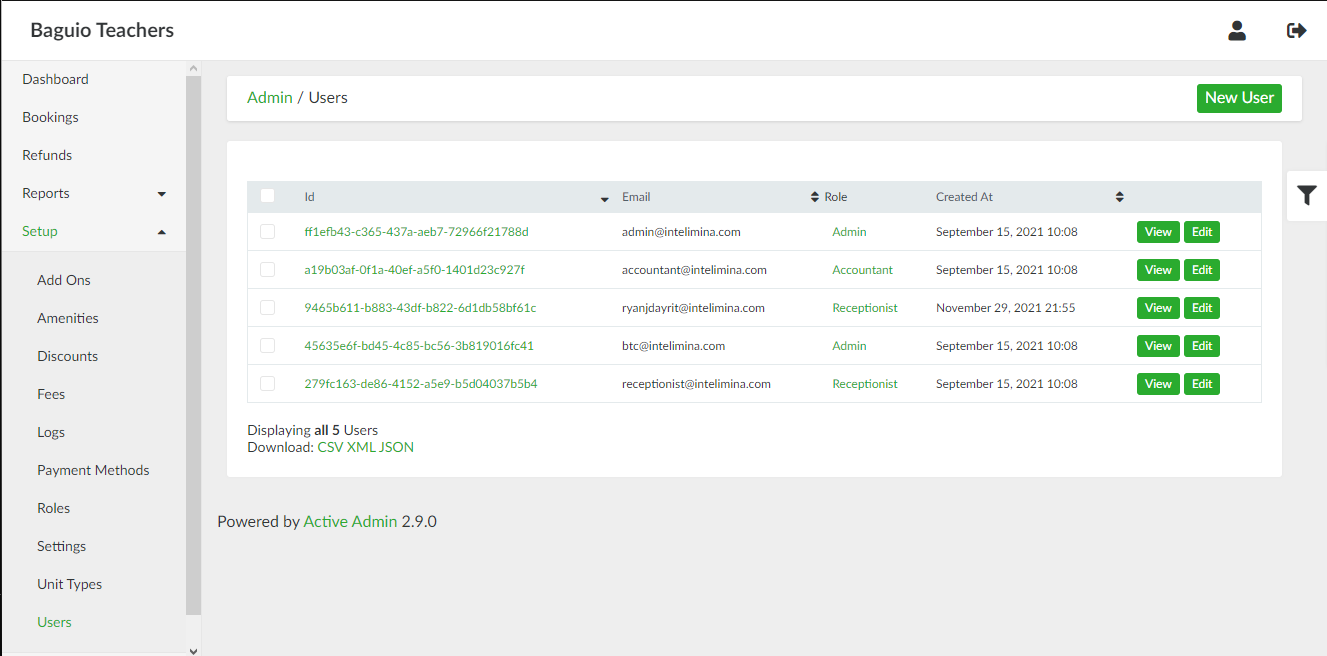
# List of Users page
List of Users page can be accessed through the side navigation pane by clicking **Setup > Users**.
[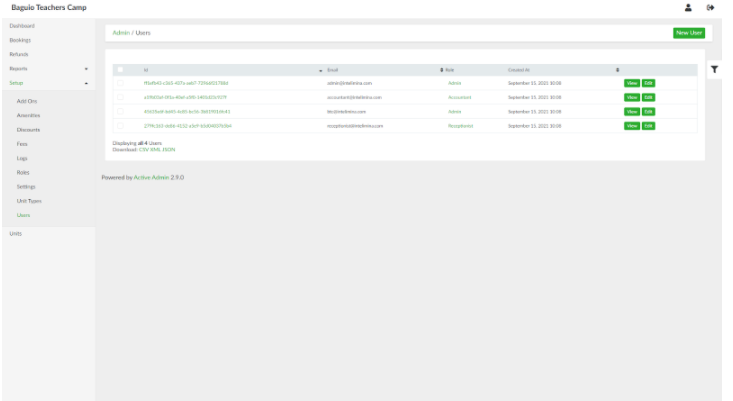](https://wiki.onlinedooze.com/uploads/images/gallery/2022-04/image-1649755222354.png)
# Adding a New User
To add a new admin user, in the list of users page, click the **New User** button. Provide the email address and the desired password of the user.
[](https://wiki.onlinedooze.com/uploads/images/gallery/2022-04/image-1649755239826.png)
When done, click the **Create Admin user** button.
# Viewing a User
In the list of users page, select a user and click **View**.
[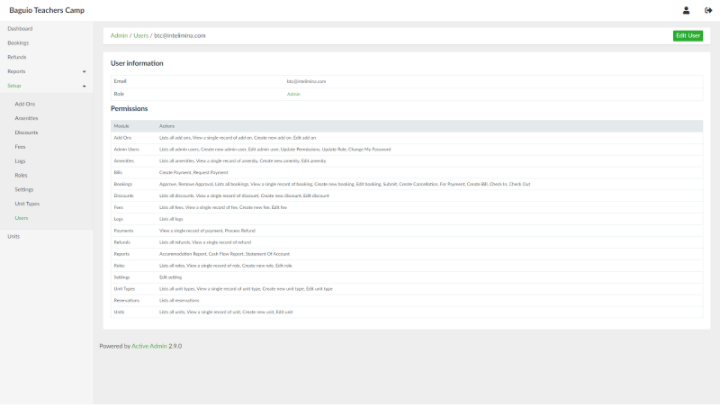](https://wiki.onlinedooze.com/uploads/images/gallery/2022-04/image-1649755264060.png)
# Updating a User
In the list of users page, select a user and click **Edit**.
[](https://wiki.onlinedooze.com/uploads/images/gallery/2022-04/image-1649755294643.png)
[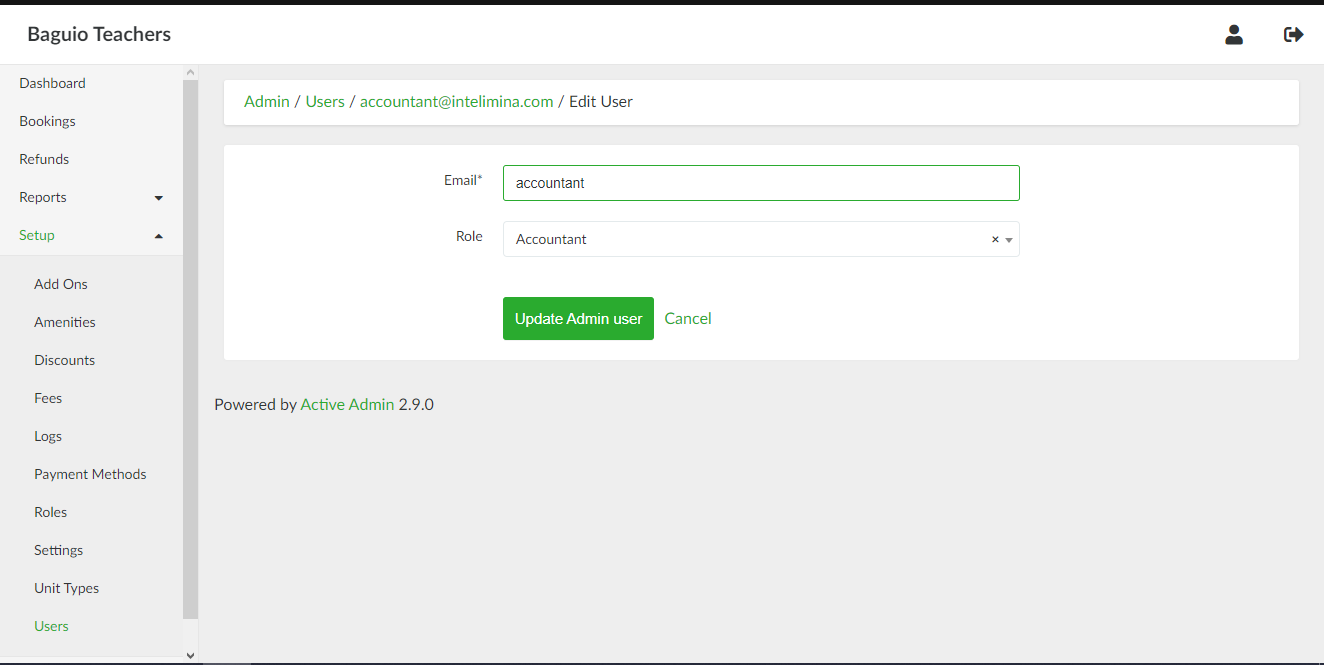](https://wiki.onlinedooze.com/uploads/images/gallery/2022-04/image-1649755337960.png)
# Refund Settings
In the side navigation pane, click **Setup > Settings.** This will open the refund settings page.
[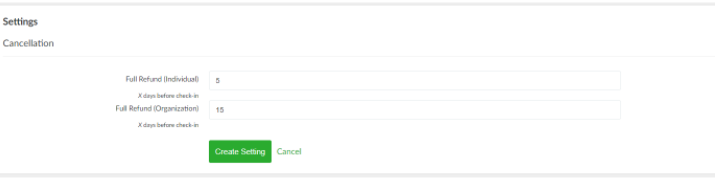](https://wiki.onlinedooze.com/uploads/images/gallery/2022-04/image-1649755377864.png)
Configure the deadline to qualify for a full refund by specifying the number of days one should get a refund before check-in. Separate deadlines can be configured between individual and organization guest types.
*Note that final refund value can still be specified by the admin upon initiating the cancellation process and this setting only modifies the suggested refund amount displayed.*# Roles and Permissions
# List of Roles page
List of Users page can be accessed through the side navigation pane by clicking **Setup > Roles**.
[](https://wiki.onlinedooze.com/uploads/images/gallery/2022-04/image-1649755443113.png)
# Adding a New Role
To add a new role, in the list of roles page, click the **New Role** button. Provide the name and description for the role. For each feature of the system, tick the checkboxes that correspond to actions allowed to the role.
[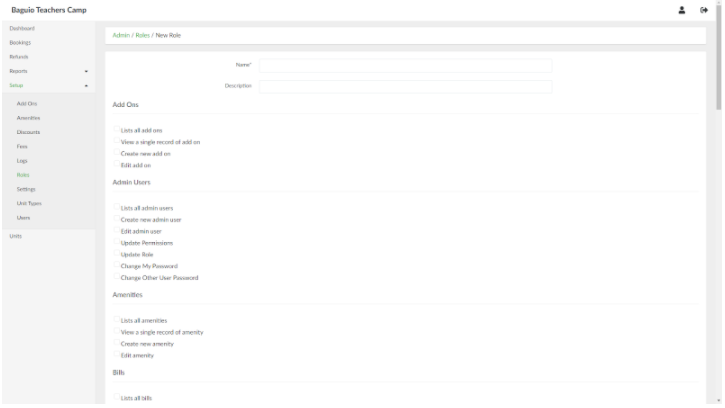](https://wiki.onlinedooze.com/uploads/images/gallery/2022-04/image-1649755467401.png)
When done, click the **Create Role** button.
# Viewing a Role
In the list of roles page, select a role and click **View**.
[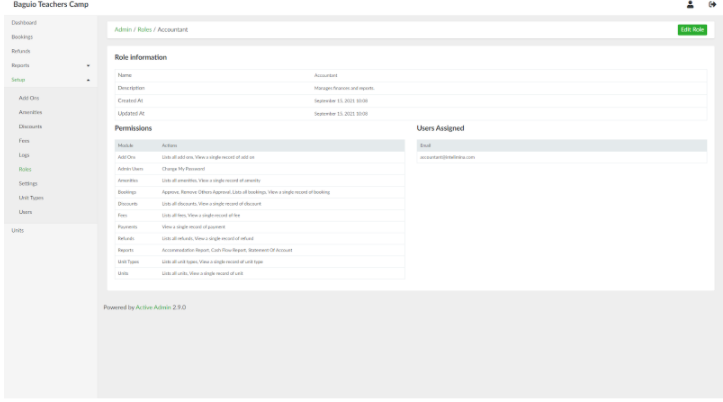](https://wiki.onlinedooze.com/uploads/images/gallery/2022-04/image-1649755499977.png)
# Updating a Role
In the list of roles page, select a role and click **Edit**. This will open the role page and the associated permissions to the role.
[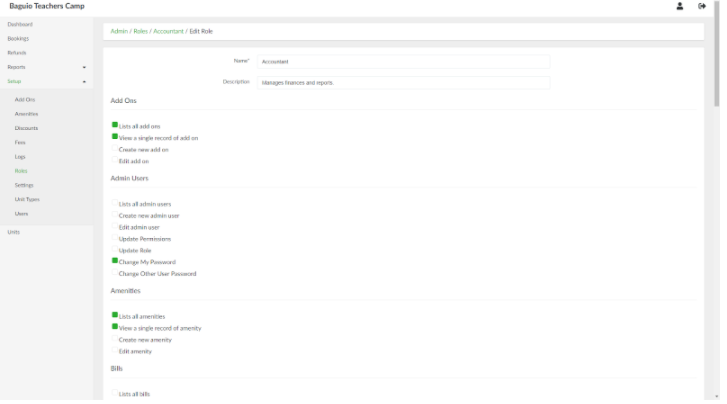](https://wiki.onlinedooze.com/uploads/images/gallery/2022-04/image-1649755521501.png)
Once done updating the details and permissions of the role, click the **Update Role** button.
# Viewing roles assigned to admin users
In the side navigation panel, click **Setup > Permissions**. This will open a page which lists down the admin users and the corresponding roles assigned to them.
# Updating roles assigned to admin users
In the permissions page, select an admin user and click the **Edit Manage Role** link. This will open the Edit Manage Role page. Type the name of the role/s to be assigned to the admin user in the Role id field.
When done, click the **Update Admin user** button.
# Glossary
# Appendix
# FAQ